Creating and Assigning Roles in Intersight
Cisco’s Intersight service provides flexible means to manage all your devices with a plethora of policies from a single web interface or via a robust REST API framework. Recent updates permit partitioning of an account and the associated resources according to use case, functional domain, etc. all while centralizing important business relevant elements (licensing, accounts).
What the Business Needs
Cisco Intersight provides a great deal of capabilities and services as part of its Cloud Operations Platform 1. As different aspects of the business would benefit from its services, the business would naturally want to put the proper governance around access to the variety of available services.
Logically, as we consider how to access control resources, there are a few different entities that we have to bring together whose combinations would result in governance we require:
- Identities, managed by an identity provider
- Devices (targets), grouped in resource groups
- Organizations, providing the collections for policies
- System Roles, granting privileges to manage specific policies and devices
Intuitively, given these elements, we define a specific user-defined role as a unique combination of the above. The business simply has to define the appropriate groupings of roles, devices, and policies that can then be assigned to a set of users and/or groups.
Building RBAC and Compartmentalization
These tasks also align to the workflow you’d follow within the GUI as well. First, we’ll illustrate those tasks within the GUI and then we’ll provide a couple of RBAC examples.
Different portions of this process could be accomplished separately by different Intersight system roles. For this exercise, we’ll use an Account Administrator so that we can perform all the needed tasks. Account management is performed in the “Settings” area, located by the gear icon at the top of the website.
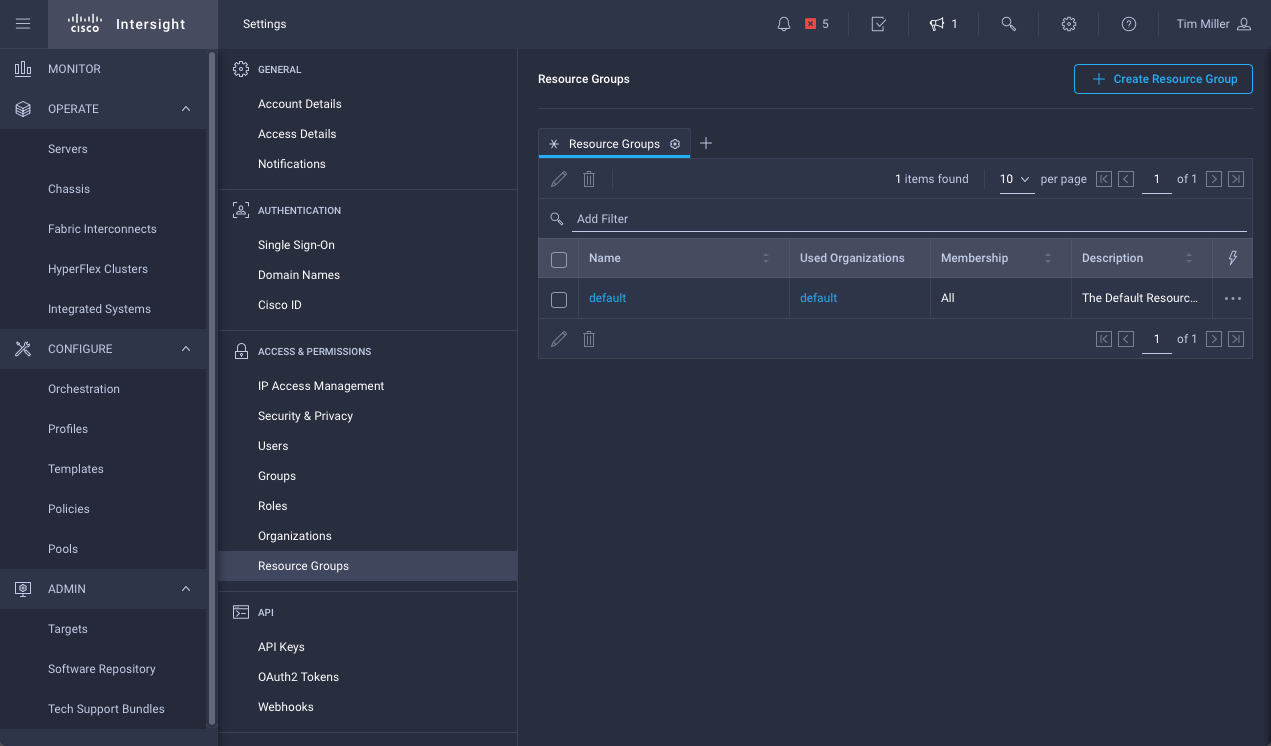
- Navigate to Settings->Resource Group, click Create Resource Groups
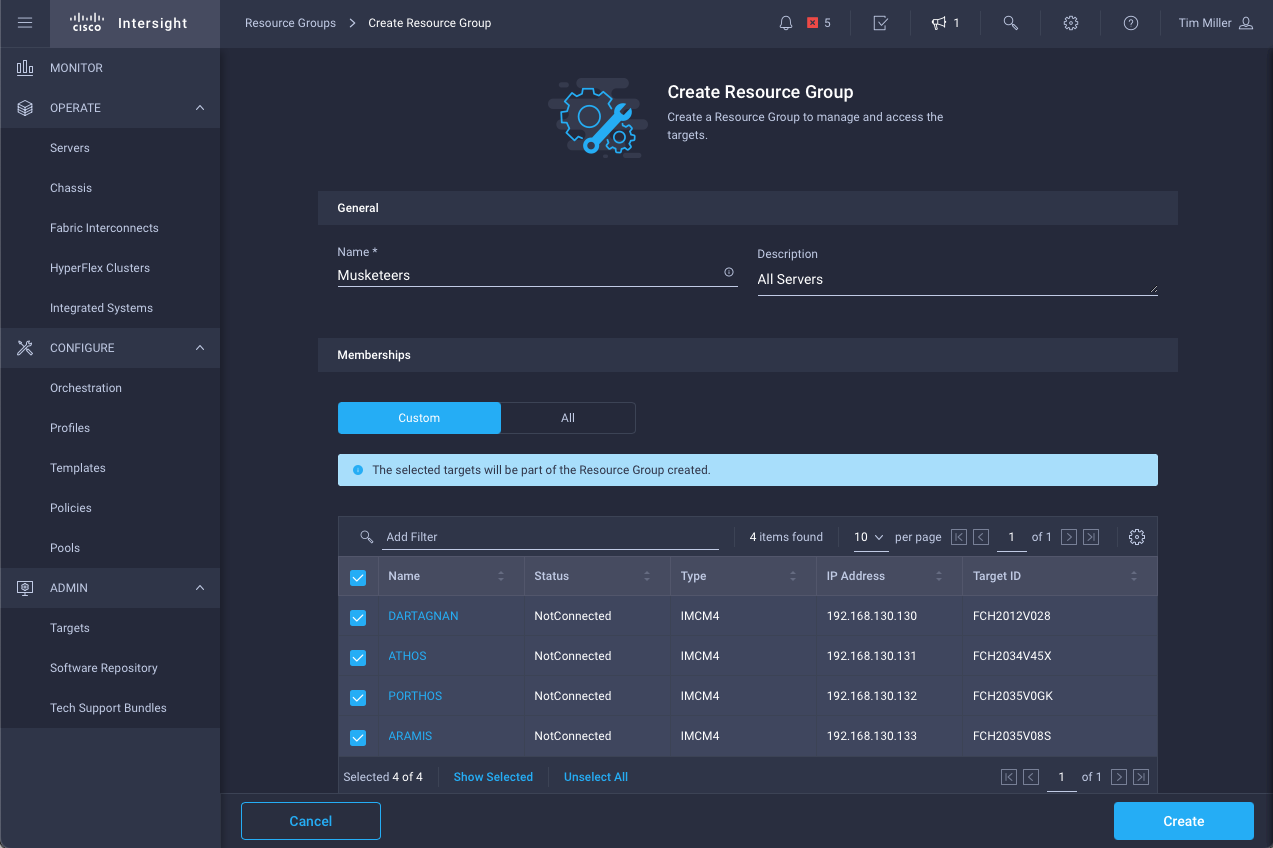
- Define the group, add Devices (Targets)
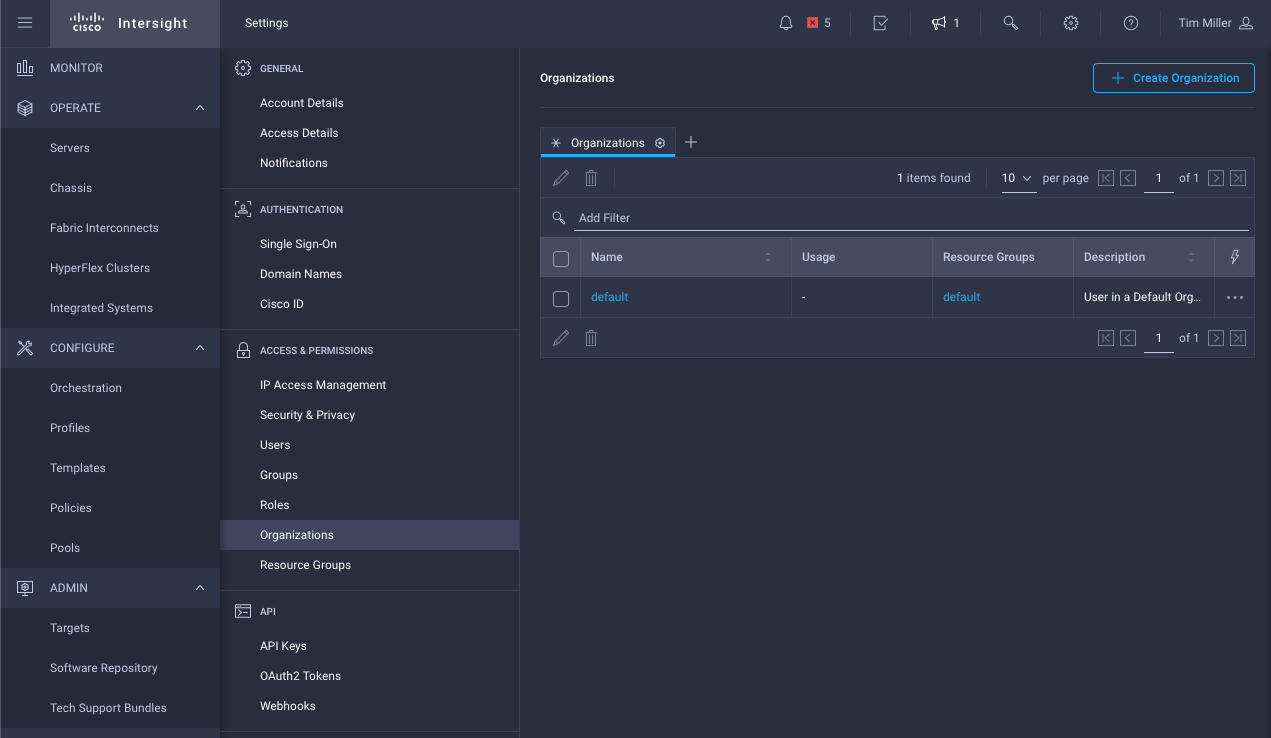
- Navigate to Settings->Organization, click Create Organization
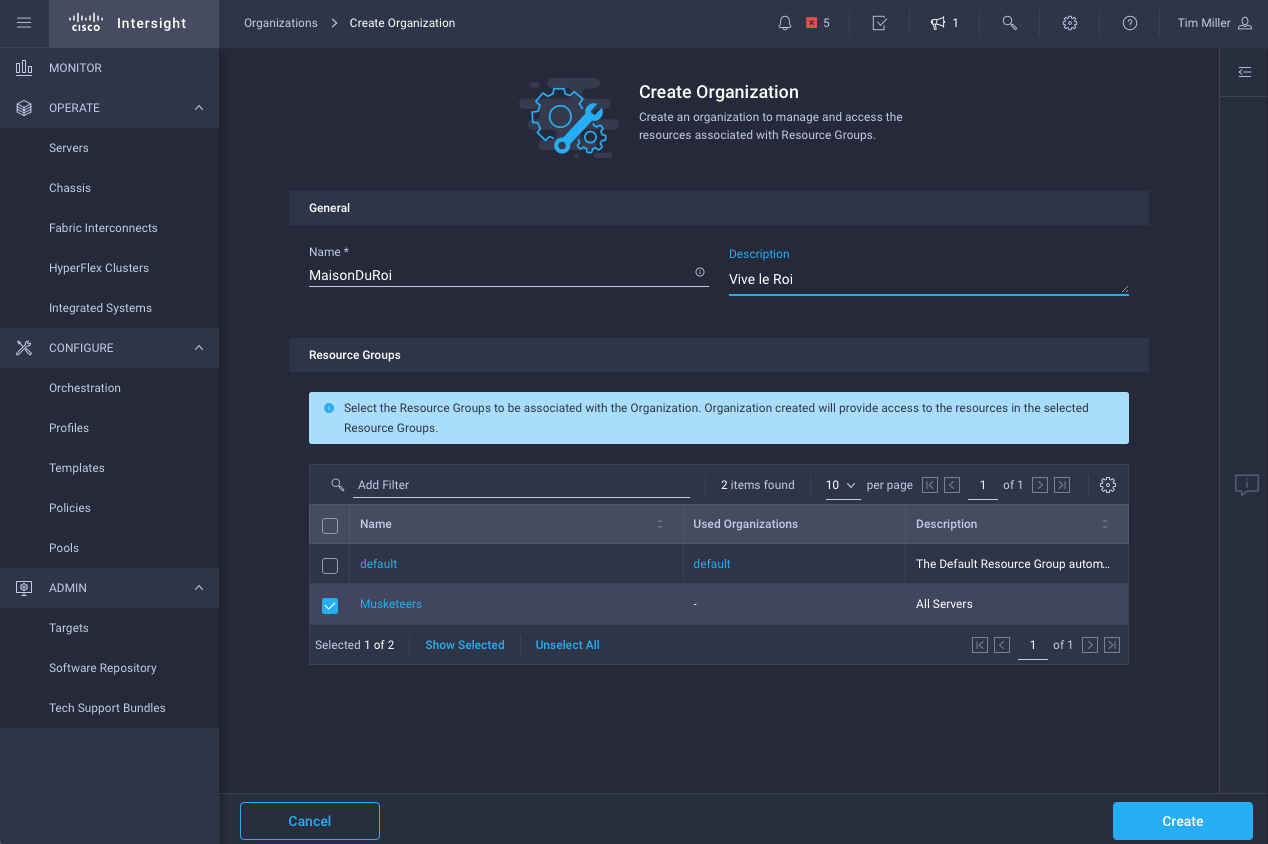
- Define Organization, claiming relevant resource group(s)
- Navigate to Settings->Role, click Create Role
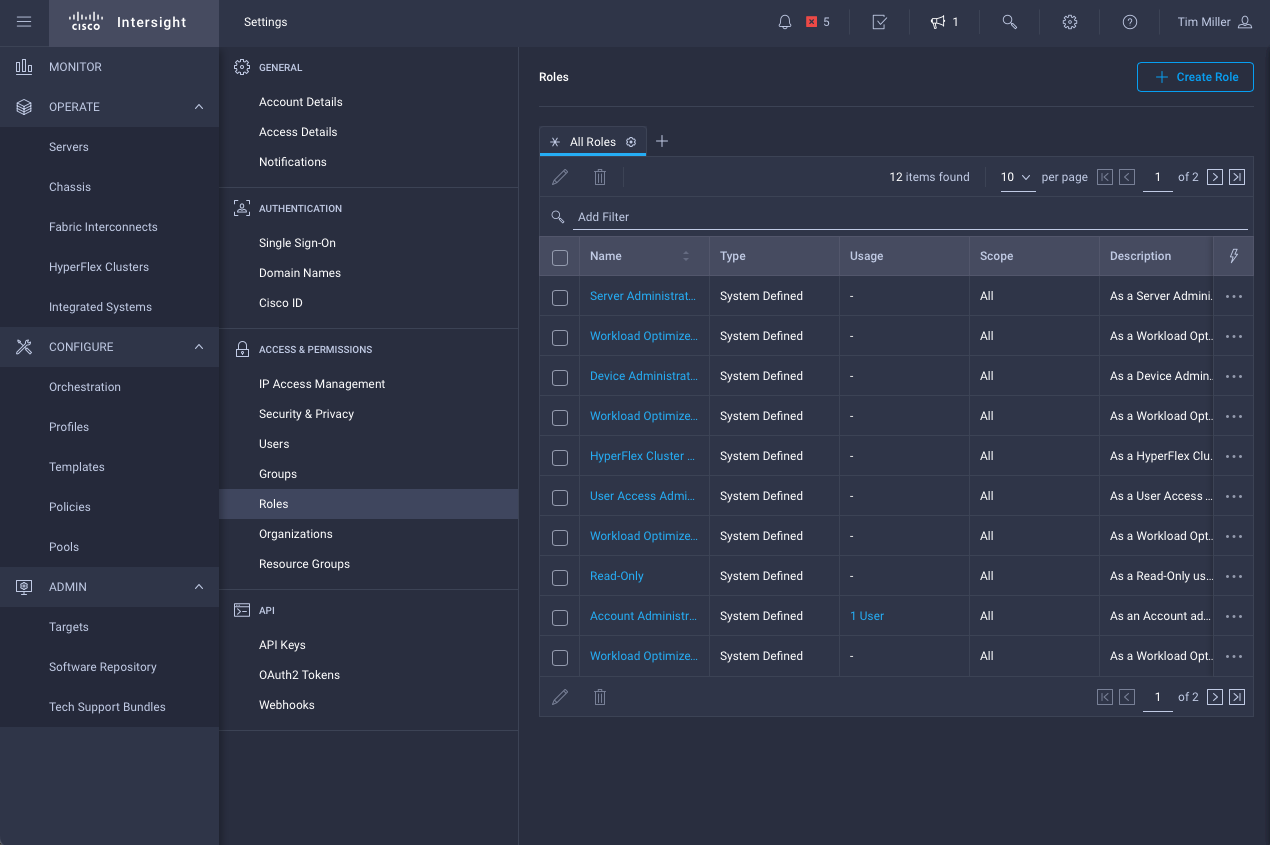
- Define Role settings
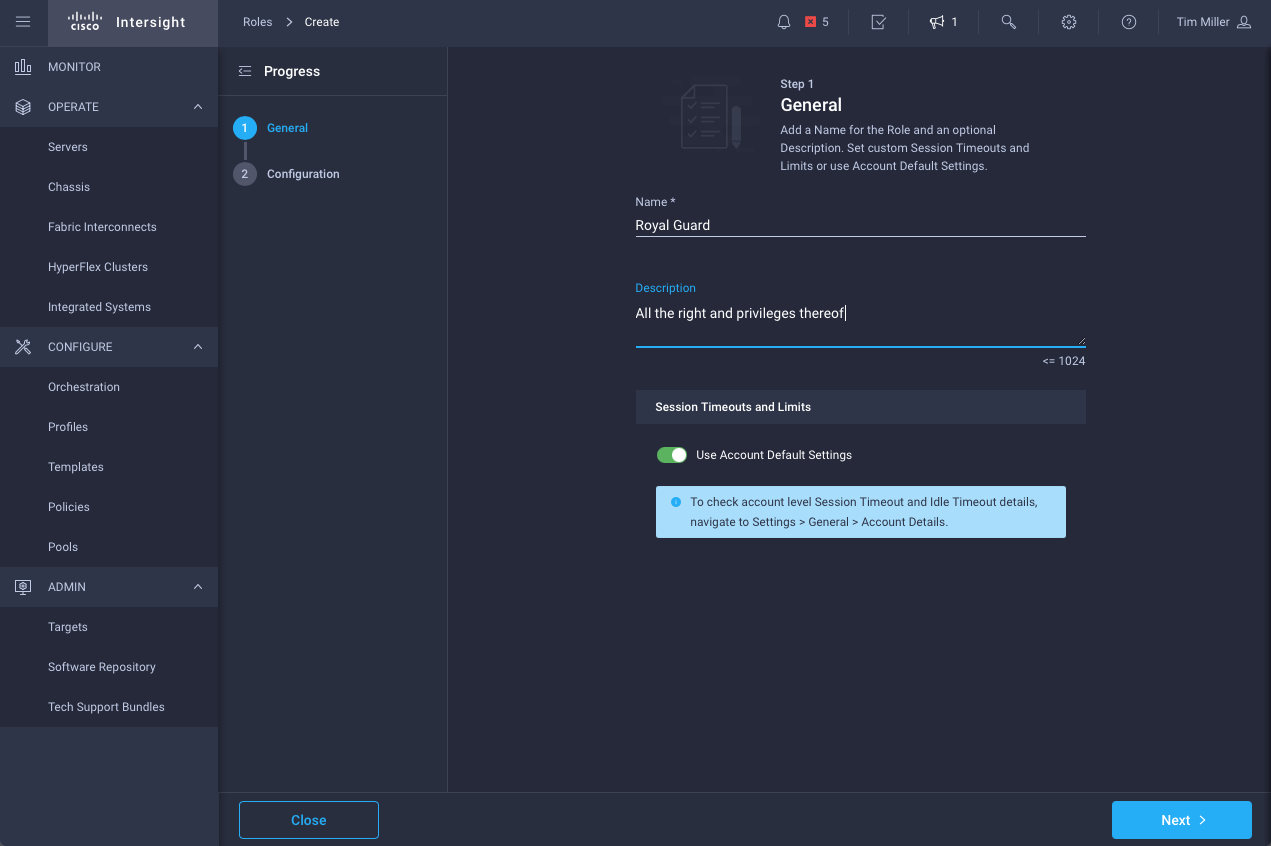
- Map privileges in a given org for this role
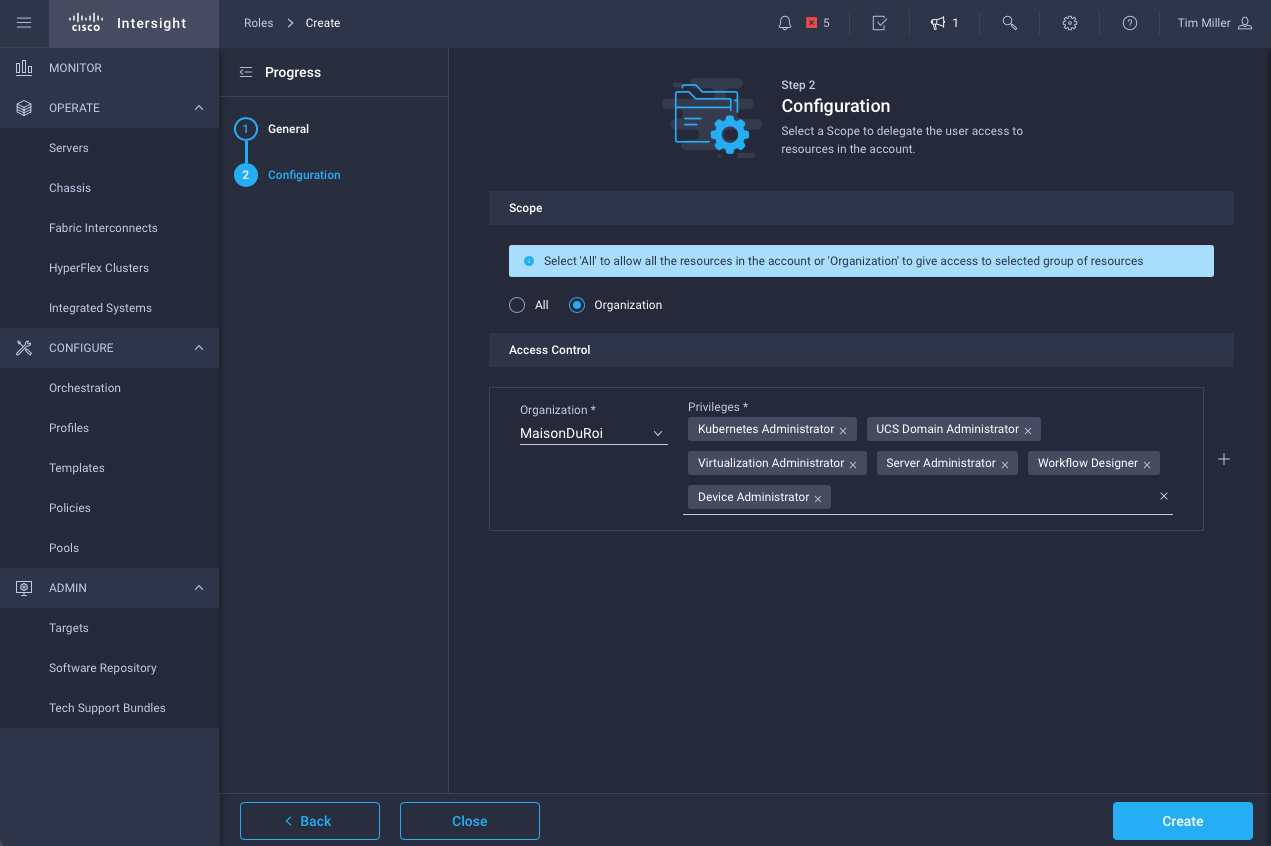
The first example, computing administrator
Now that the role is defined - which as the images show, focus on computing platforms - we’ll add a user to the account and only provide those privileges. Intuitively, you would be correct in assuming these actions (above and below) require a user to have Account Administrator role.
- Navigate to Settings->User, click Add User
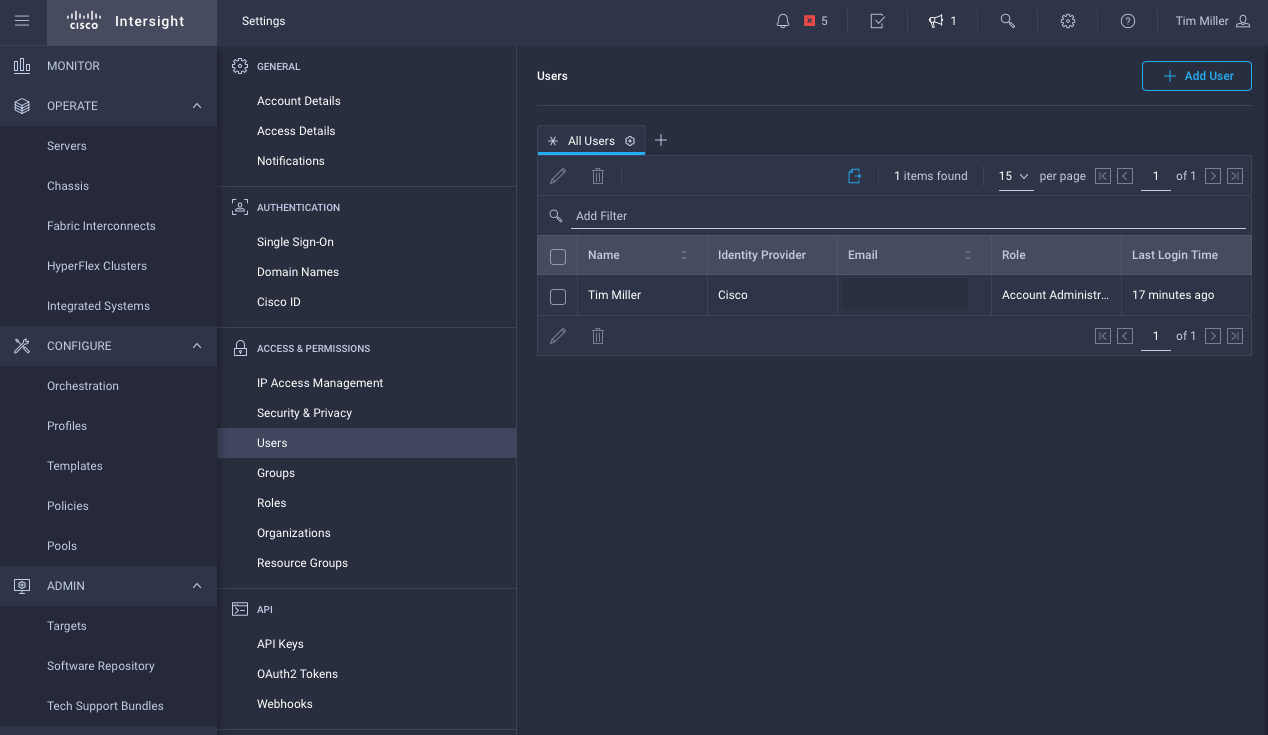
- Add User to Account, Binding Roles
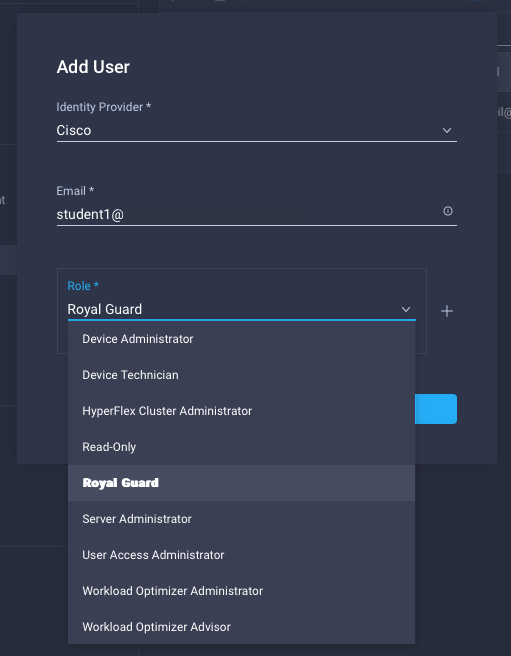
When this user (“student1”) is added with a single role, their login into Intersight is straightforward:
- Navigate to https://intersight.com/
- Provide user credentials (and MFA, if configured)
- Connected to the dashboard entitled by the single role
For the above setup, that initial log in could look something like this:
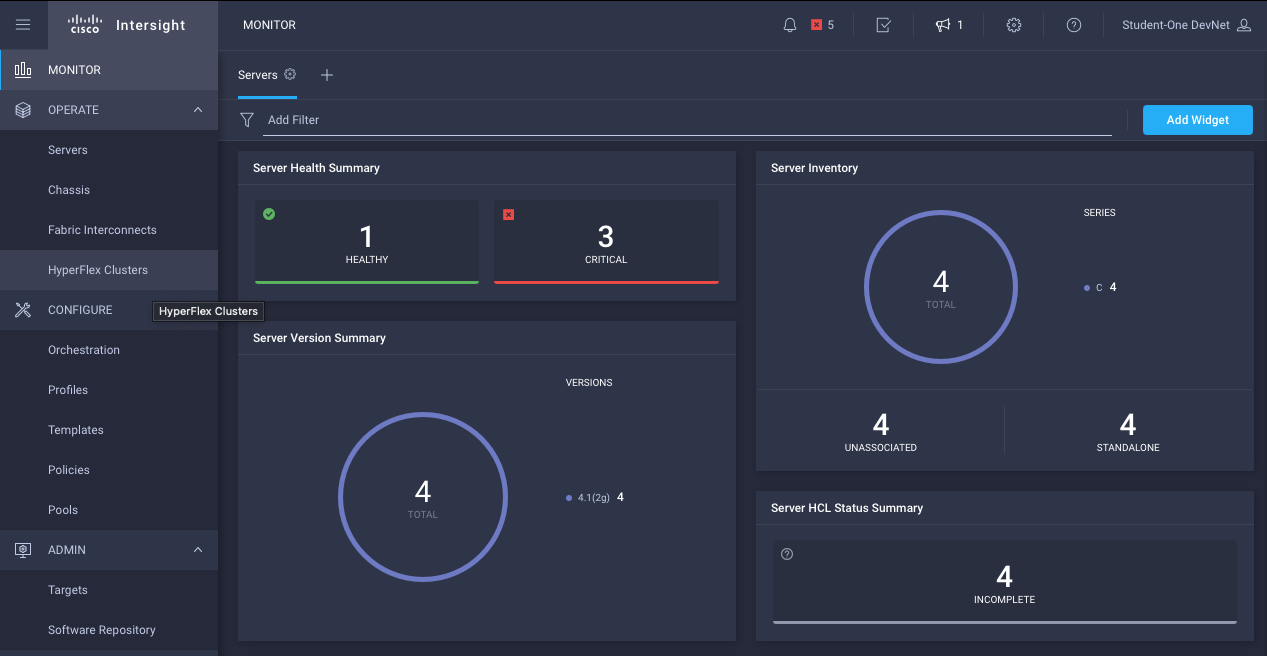
All this user would know about the Intersight connected environments are the computing environments that person is meant to administer. Any other Intersight capabilities would be hidden from that user.
More Flexibility via Additional Roles
Intersight, however, can connect to networking devices in your data center as well. Perhaps “student1” also needs visibility into those devices, but not the ability to administer them. To enable that, we’ll need to create an additional role to match those new responsibilities.
- Navigate to the Settings->Role area as before, click Create Role
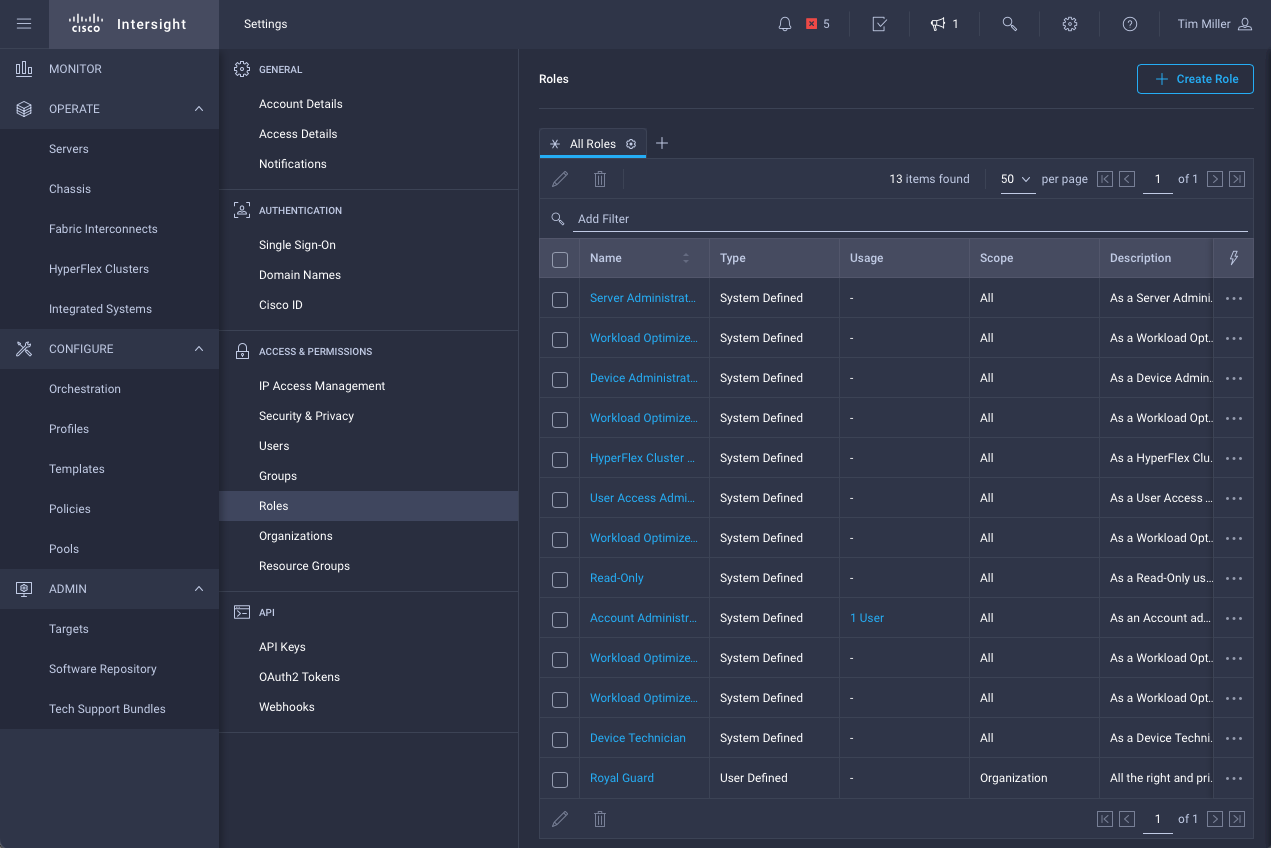
- Define new network operator role
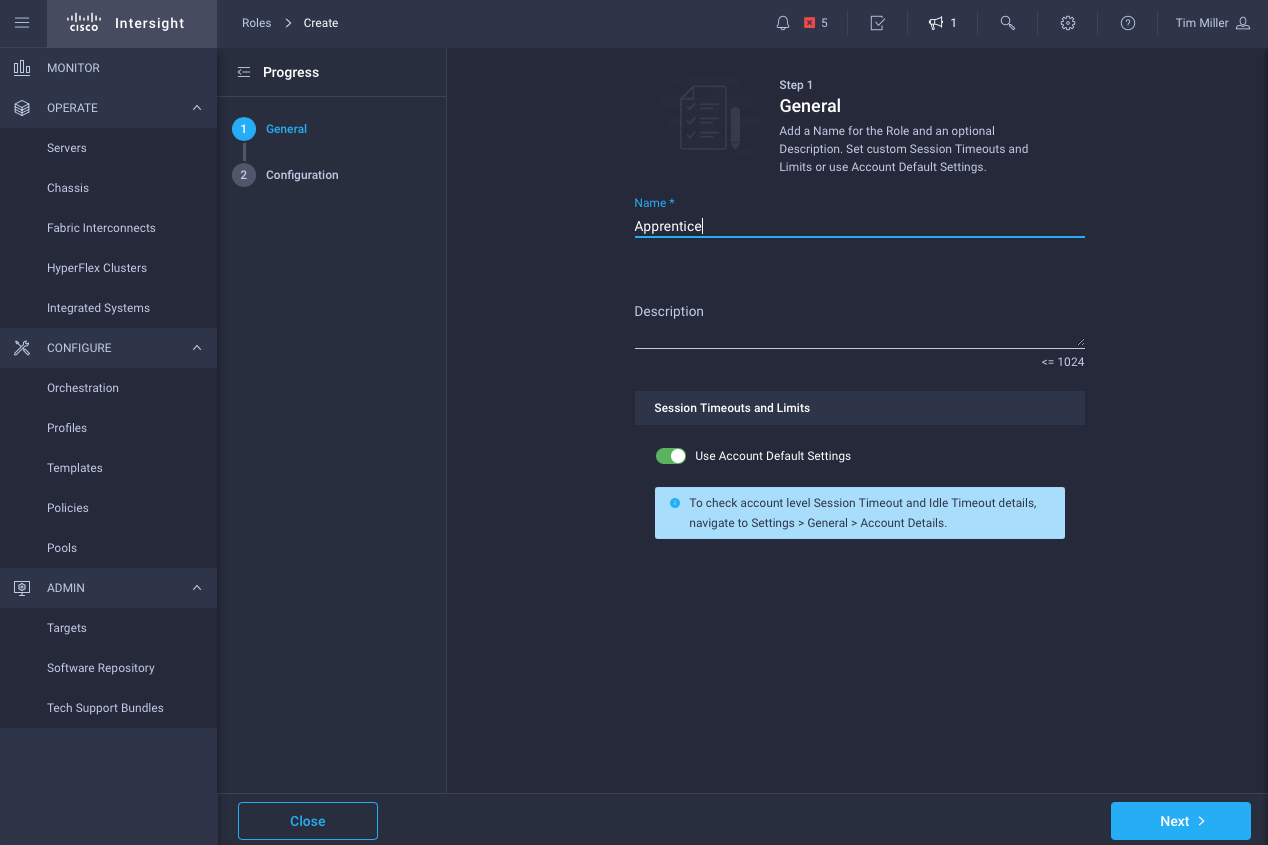
- Map operator privileges to this organization
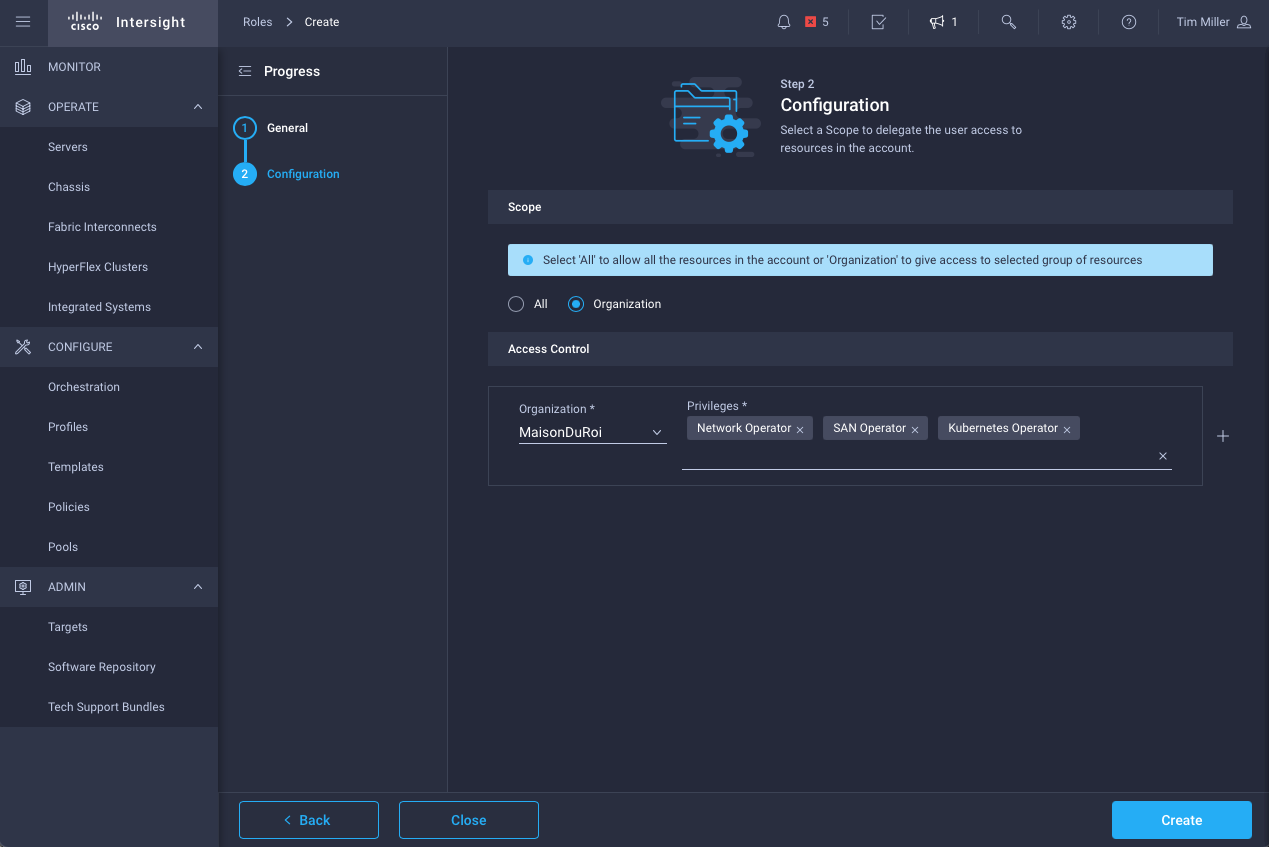
Once created, we need to update the user’s settings and add the new role.
- Navigate to the Settings->Users area as before
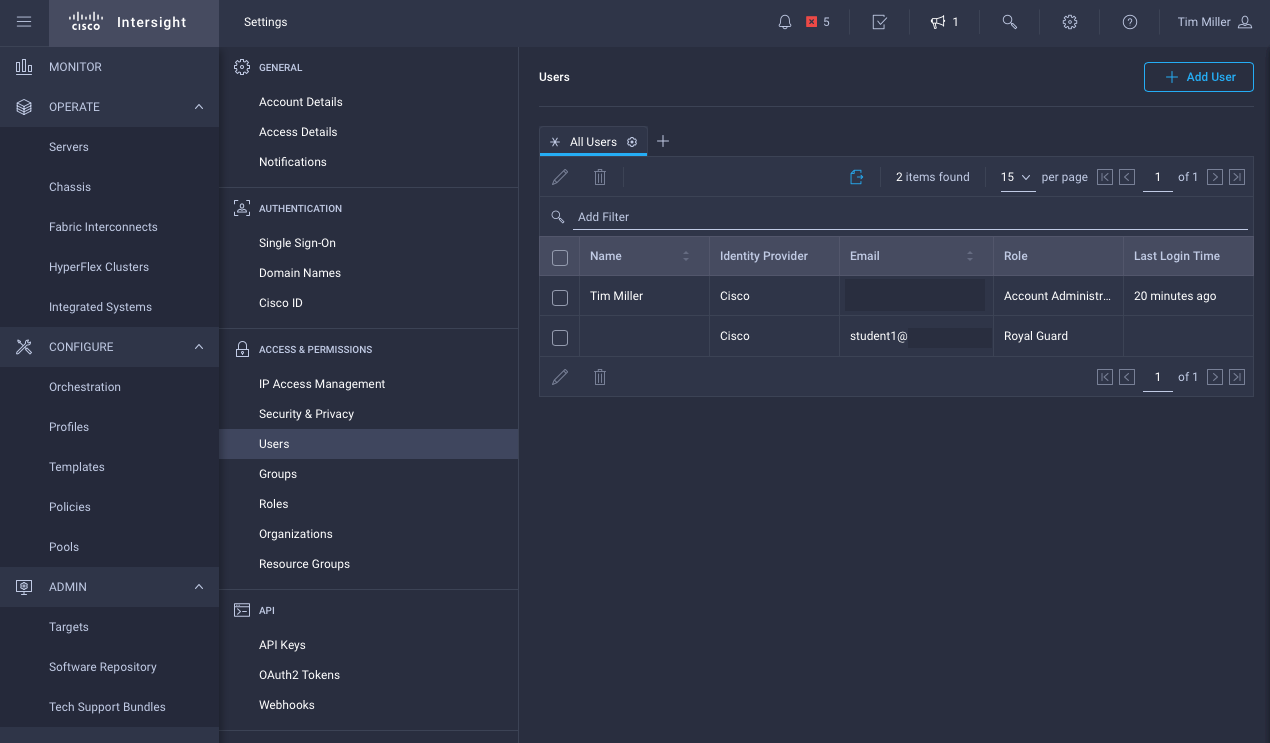
- Select the user check box and click the pencil icon to edit. Then add the role by click the ‘+’ button and selecting it from the dropdown menu:
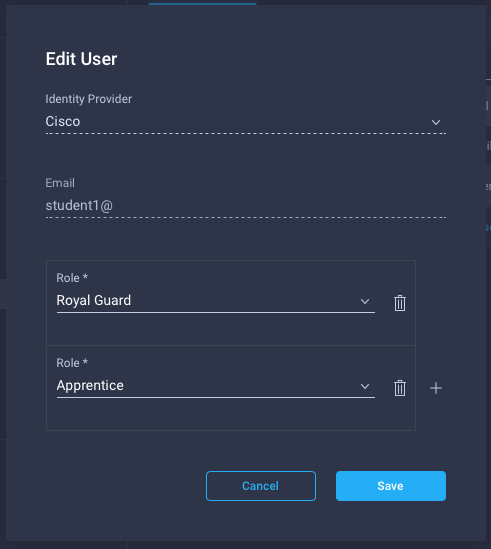
The second example, compute admin and network operator
With the updated roles and, of course, when the user logs out and logs back in, the login experience will be slightly different. After authentication, the user will be presented with a selection of roles to choose from:
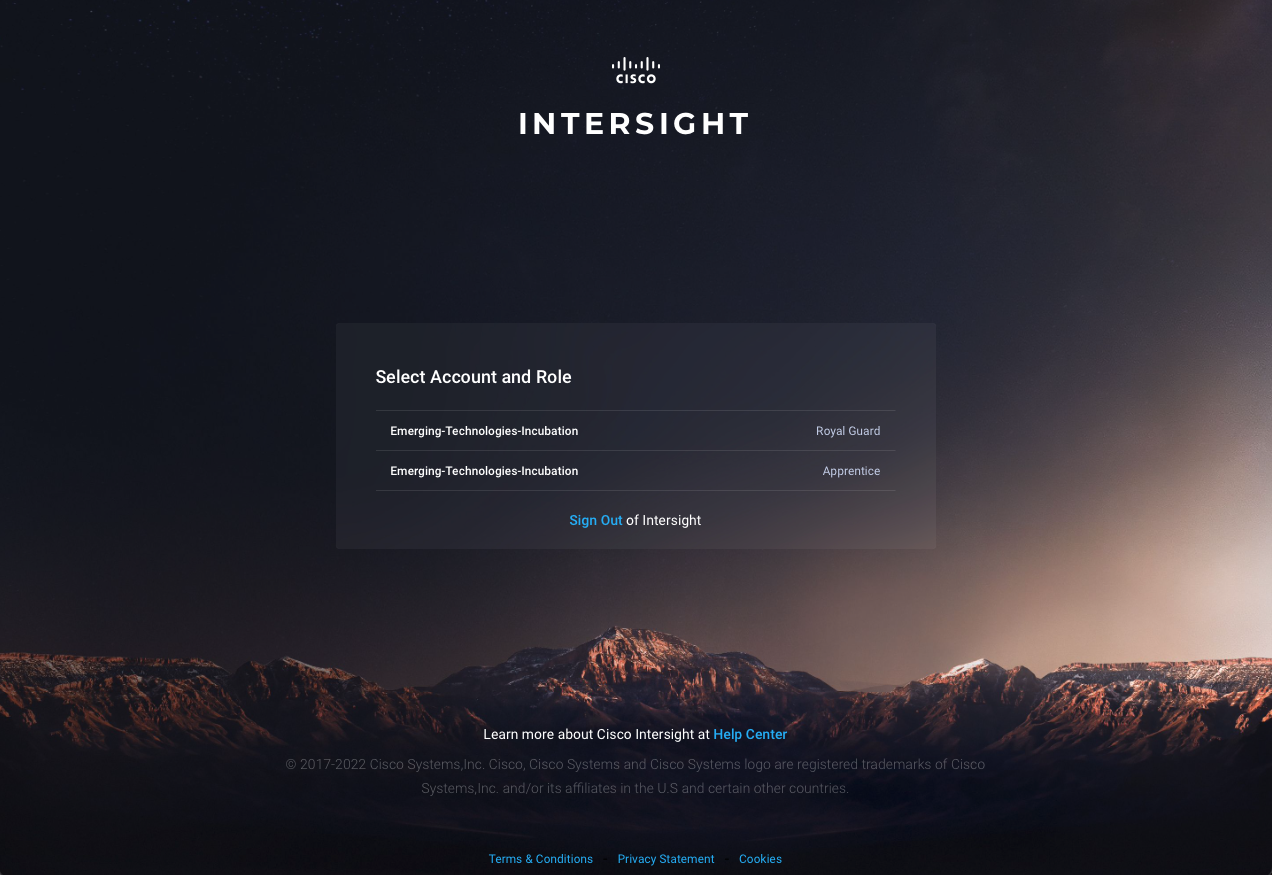
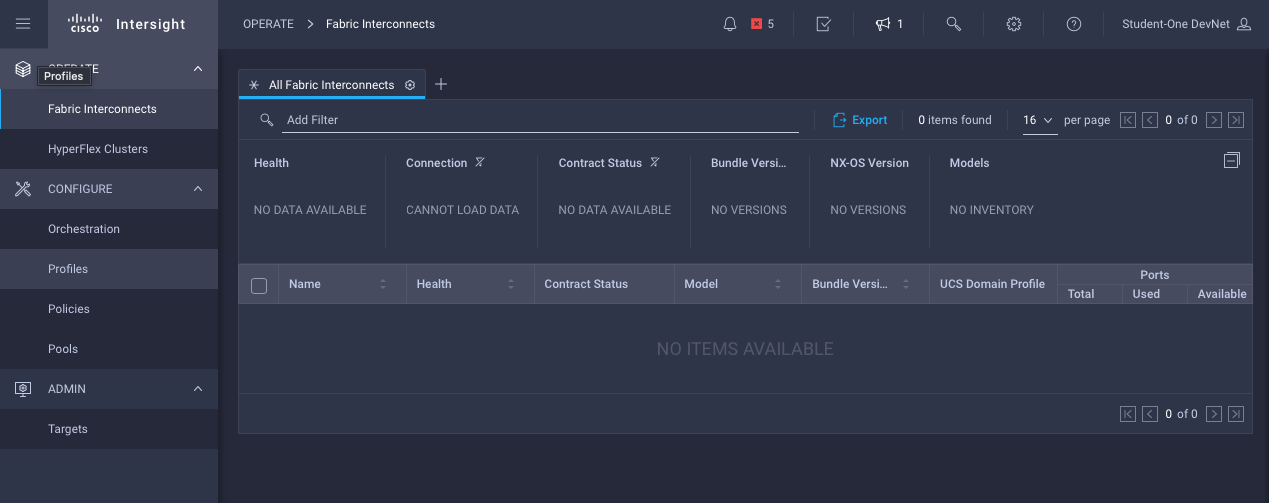
Once connected to the respective role’s dashboard, the access will be limited accordingly to the role’s privileges. In the following screenshot, as an “Apprentice” role, the user has no visibility into any Hyperflex related properties:
Navigating Multiple Roles
In the Intersight ecosystem, with approach laid out above, the strict separation of roles and privileges for security purposes prevents a common view of “read/write” objects from “Royal Guard” to intermingle with “Apprentice”. “Student1” must switch between the roles, as shown below, in order to release one role’s privileges and gain a second role’s privileges.
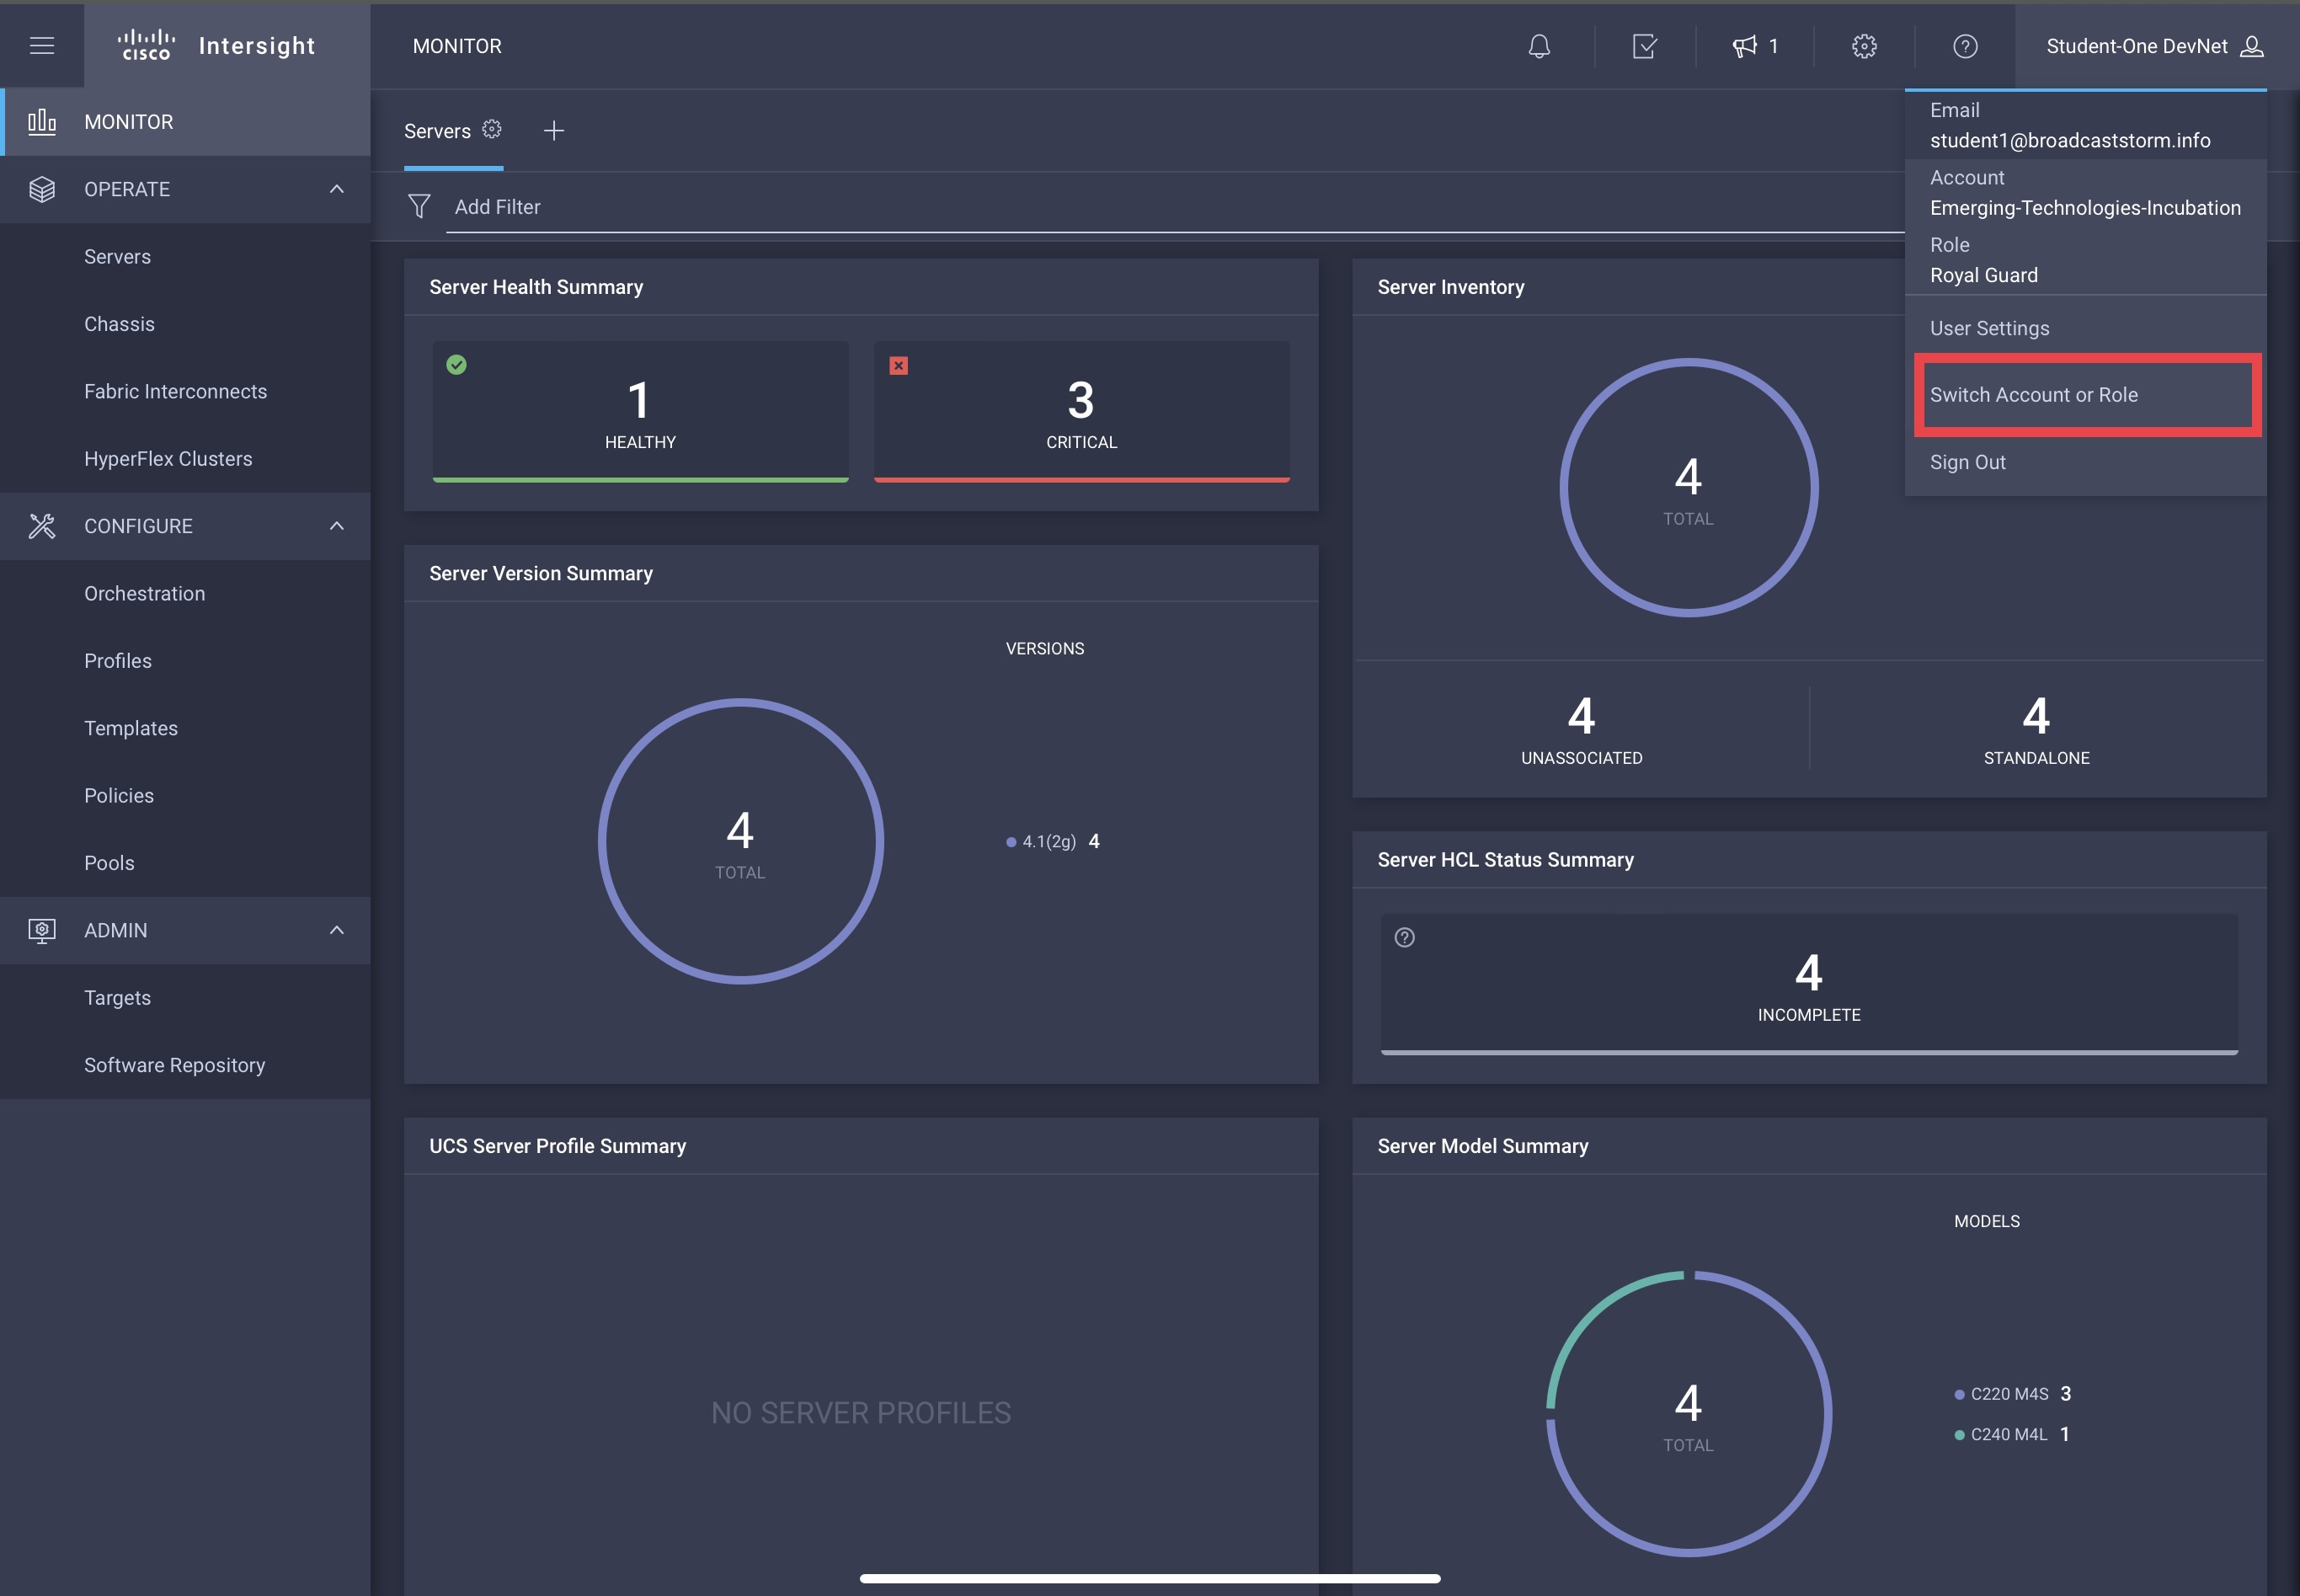
The user will again be presented the “Role Selection” screen similar to first login.
A Reality Check
The above examples were contrived to show multiple distinct roles for the purpose of illustrating the capability. In reality, if a single person/role needed computing admin and network operator privileges, you would almost certainly add those privileges to the same role, as opposed to separate roles in the same account.
Separate roles are typically used to align to different teams/responsibilities in the organization. The above network operator role would be assigned to network operators. The computing admin role assigned to system adminstrators.
A further segmentation is possible - as you might intuitive suspect from closer inspection to the “Role Selection” screen - by creating separate accounts for different business units (for example) and then the various teams in each unit could be then be assigned appropriate roles.
The combinations are fairly flexible and powerful to meet many business’ needs.
Next Topic
In the next blog, we’ll build on this foundational information and demonstrate how to implement these roles via automation, specifically Terraform!
Employment Disclaimer
-
This blog post is my own words, written on my own time, and for my own self-interest/gratification. Nothing in this post has been approved by or in any way represents official statements from my employer. The entire content could be completely wrong and you should test its veracity with the referenced materials in a development environment. The usual “no warranties implied, explicity or implicity” warnings apply. You should also refer to my Conflict of Interest disclaimer post as well. ↩